All you need to know about Filling White Space
When filling out your embroidery order you will come across the Fill White Space button. What does fill white space mean? Most artwork presented to us is on a white background, but the question is relevant when there is also white in the logo. Fill White Space refers to determining if you want stitches in the white areas or not.
Filling White Space Checked
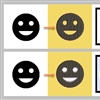
In the image below, selecting, ‘fill white space’ indicate to us that the area inside the mouth and eyes would be filled with white thread.
In the case of Smiley-Border-Fill, the border around the image gives us a new space to fill with white thread.
Fill White Space Unchecked
When ‘fill white space’ is not selected, we would only do what was printed. Meaning the black areas would be the only places we would fill with thread.
Pros of filling background space
You may want the area filled for several reasons. One may be to help stabilize the fabric. Also, if the fabric is textured or has pile, the design will probably come out better with a background fill. Also, with certain shapes and letters, it is best to do this as stitches rather than a fabric only option. The look will be much cleaner.
Cons of filling background space
It will most likely add to the stitch count. More stitches could be detrimental if you are talking about a logo with a lot of stitches in a small area. When doing a match color of shirt option, this could increase thread costs and add a lot of thread color changes. Without a fill, some designs may pucker more, especially on performance wear fabric.
Different Shirt Colors
Different colored backgrounds can influence the appearance of the design depending on if fill is or isn’t needed. If we are not filling white area with stitches, the shirt color will always show through the open area.
If we are filling the open area with stitches, you could create a design with similar or contrasting thread colors to the shirt.
Your Selection Can Determine the Look
First take a look at these next two logos are very similar but will look quite a bit different depending on your choice to fill white space or not. The logo on the left has all of it’s white space trapped by borders, whereas the one on the right does not.
With the first logo, if ‘fill white space’ is not selected, the white area inside the box, and the white outline around the letter ‘M’ will have the fabric shown through. To sew out even, we have put a satin border around the fill of the M. This keeps the fill from pushing or pulling out of shape.
If the option to ‘fill white space’ is selected, the white box, as well as the border outline, will be sewn with thread.
The second image is a little trickier, notice that the box, the outline around the ‘M,’ and the letters are shown in white.
If the option to ‘fill white space’ is not selected, the inner border of the M will not be shown. As a result of the black filled areas of the letter, ‘M’ are sewn with a flat fill stitch and satin stitch in the same color around it to help keep its shape. Without fill in the word Colonels, the legibility and sharpness are going to be harder to achieve.
Alternatively, when white areas are being filled, the white break between the M and the box will continue wrapping around the entire box. Whether or not to fill white space with thread is a simple but important question to consider when submitting your artwork to be embroidered. In most cases, we recommend selecting the fill white space box, but the decision is yours.
For additional questions, please contact us!
digitizing@ignitiondrawing.com 254.284.0733 ignitiondrawing.com


0 comments on article "All you need to know about Filling White Space"