Digitizing – Next steps when working with 3D Puff designs
Digitizing for 3D Puff Embroidery
Adding 3D puff embroidery to your design is a great way to make your logo stand out, but how is it digitized?
Foam is added to the design to create loft. Because of this, we need to digitize specifically for the foam areas. The 3D part is always last, so if you have flat areas in your design, you will need to do those first.
While this can vary, there are usually these steps:
- Flat embroidery
- Placement line for foam
- Puff area
In the picture below, the top color stop (outline) is flat embroidery. The second stop is the placement line which will help the operator determine where to place the foam. The third color stop is the 3D part of the design.

Perforating the foam

The foam needs to be perforated, similar to a postage stamp, to the shape desired. This is done by using a satin stitch that is twice as dense as regular flat embroidery. The needle points are what cuts the foam. The entire perimeter of the shape needs to be cut. Since satin stitches have open ends in the columns, you will need to create a cap. The outer edge of the satin stitch cap will help perforate the foam.
Like a stamp, the foam will need to be perforated around the perimeter of the puff area.
Top stitching
Top stitching will go over the caps. The final satin stitches will cover up the caps and other underlay. Making the stitches more dense is not all. We need to do something about the open areas (circled) or foam will be exposed as shown below.
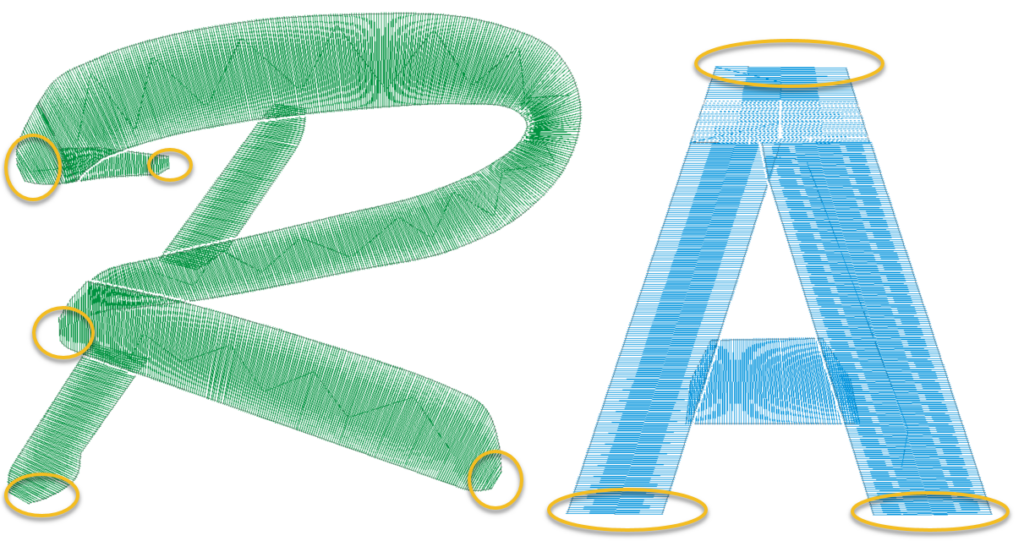
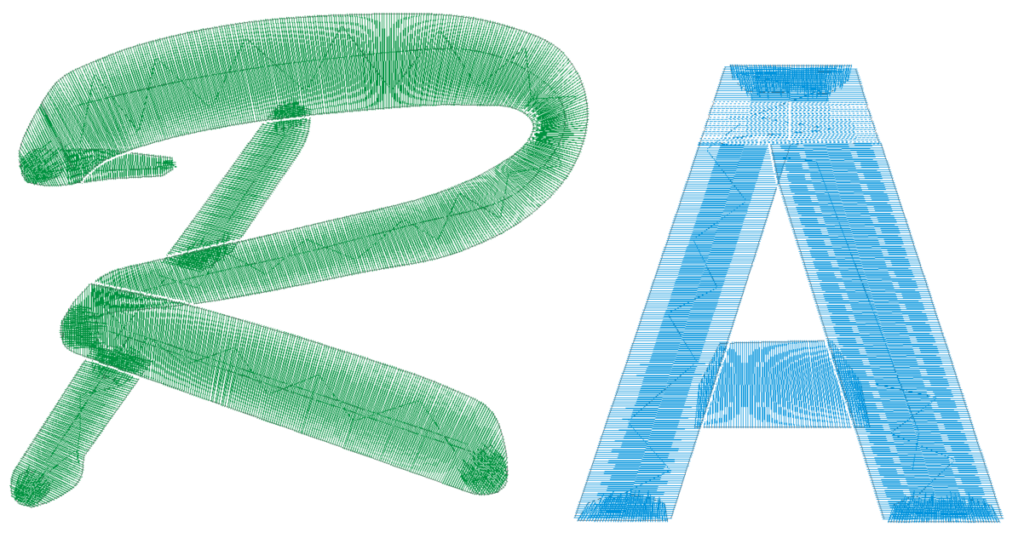
Shown here, in the following image, are the caps, which will help cut the foam on the otherwise exposed areas, these are done before the top stitching and will not show.
On the left below, the hilted parts are known as “caps”. They help perforate the ends of the design that might otherwise let the foam peek through. On the right, a design might have certain stress points that will also need stitches. Wherever there is a chance of stitches pulling apart, this underlay will prevent the foam from showing through.


Watch for our next installment in this 3D Puff series, when we go through the process of embroidering the puff design.
Author: Jesse Elliott
Over 30 years of experience in digitizing embroidery and screen printing